Tuesday, 19 November 2013

Birds of Prey Experience

On Sunday we had the most amazingly memorable, uplifting, visit when we went into Cheshire to experience birds of prey.
 A perfect cold, Autumnal, rainy day! I'm still on high!
Find out all about it at The Stockley Farm Birds of Prey Centre, where the birds are usually flown, but through the Winter months the centre is closed, so they are now holding events at Bridgemere.

This first photograph is a fabulous fluke taken by DH as he held out his gauntlet to receive the bird and, with camera in his other hand, he swung his arm across and chanced a click. 
I think it looks just like a painting.
Gary and Pam were so informative and fun and so obviously loved their birds and cared for them so well. They told us so much about the birds habits and characters and we were able to hold and observe them close to. It was really amazing, and such a privilege, to be eye to eye with such beautiful creatures.
 A dream come true for me but one I know I will experience again and again!
You can spot Gary across the lake after he sent the barn owl across to us.
  I had expected the visit to be mainly observing the birds but it was really interactive.
These falcons are so streamlined and powerful and are faster than any creature on land, in fact 4 times faster than a cheetah! 

DH with a Harris Hawk
I fell in love with this young American hawk who looked just like a giant chick and was such a funny character.
He kept landing on our heads... cute!
This young boy was passing by with his family and Pam gave him a treat.... a chance for the Harris Hawk to fly to his name sake Harris.


DH with the little barn owl
This big fella weighed about 5lbs and was quite a job to hold up. I'm laughing as I had to watch him having his reward..... a day old chick which he gawked down and swallowed whole! Arrrrghh!
It was fascinating to watch his head swivel around giving him 360 degree vision.
The falconer, Gary
Another arty accident action shot.
With wings wet with rain, a little rest for this fellow before finishing flying the rest of the way.

It was such a drippy, rainy day but the fine rain on the cobwebs was Nature's art.

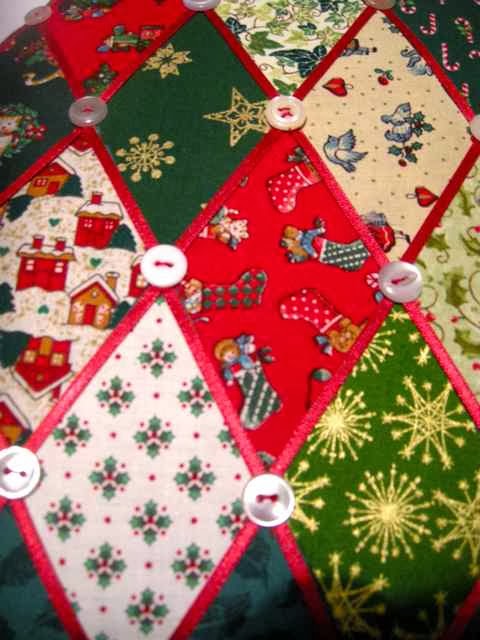
Afterwards we visited the Bridgemere Garden Centre, which is a HUGE place and was all geared up for Christmas. 
We had a mooch around their seasonal exhibits and enjoyed tea and cake in one of the several cafes before heading home after a great day out.


Friday, 15 November 2013

Patchwork Christmas Trees Galore

I've been mad busy making seasonal items for a fundraising craft bazaar on behalf of CHICS children's cancer care support group. Usually, I never do anything Christmassy until the last minute but when I did my patchwork demos, some weeks ago, in Abakhan I had to start early and have some seasonal items prepared. Most of all the items I made in the store will go to the fundraiser for CHICS and I have since made so much more for their stall. Just a couple of things are earmarked for family.

I'll add a few details of how to make each item as I go along.

This easy tree hanging is made from 4 1/4 inch equilateral triangles of fabric (the backs can be plain). Just sew together two triangles, leaving a gap to turn inside out, then stuff them with a bit of wadding.
Sew them together as in my picture and decorate with bobbles, bells, bows, to your taste.
It can be made bigger or smaller, as you prefer, by adjusting the size of the fabric triangles or by adding more rows.
I would suggest that it is better if it has a cane inserted into a casing along the bottom as it then hangs much better.
This next tree uses fabric origami and is constructed from units each of 5 inch triangles. 
Each unit consists of 2 pieces of contrasting fabric sewn together, turned inside out and pressed.  The centre point of each side is taken to the centre point of the triangle then stitched. 
The triangle is then reversed and the process repeated again taking the sides to the centre and then stitching to hold them in place. 
A button, bead or bow decorates and covers the centre stitches. 
The are lots of directions for this tree on the web, pinterest, Youtube etc.

The next simple tree hanging is made from Suffolk Puffs (also called Yo Yos), a traditional patchwork technique.
Circles of fabric, are stitched around the edges then pulled up to gather into the centre. Buttons or bows hide the centre fabric ends and stitching. They are then stitched together, at the contact points. into the tree formation, as in the picture. 
The circles of fabric should be approximately twice the desired finished size required for the puff. I think mine were around 4 inches and therefore 2 inches finished Suffolk Puffs.
(Optional) I inserted a circle of card into each puff to add a little weight and help the tree to hang better.
Next a quick tree with VERY little sewing....
For this tree I ironed bonding web to the back of my fabric then cut out my diamonds which were ironed to fuse them, close together, onto a base fabric, in the arrangement shown below.
I then laid ribbons along the line of the triangle edges then decorated the cross points with vintage buttons. This both secured and decorated it but also hid the cut edges.
I then stuck it over a piece of card and backed it with felt. Quicky, easy peasy!
Close up of the "ironed on" diamonds to show that the joins just don't show.
.
The tree decorations below are hand stitched over small card triangles in the layout as shown. Lots of instructions available on the web but they are quite simple, though a little time consuming, to make with being all hand stitched.


Finally, here's a work in progress. I was shown how to make this tree hanging by a lady in a craft group I visited and it is made from plastic milk bottle tops. A good recycling project but it takes ages to collect enough tops. There are 21 already in this one and I may add another row before I back it with felt.
I asked a local cafe to save their tops for me as we don't use much milk but maybe family and friends could provide enough.
                      Circles of fabric are gathered then a little wadding is added before inserting the bottle top and pulling up the fabric and securing. They are then stitched together at the contact points and when complete the tree is backed with felt.
I enjoyed making this as I always love to recycle whatever I can but it did take a good while to construct.
It has been really enjoyable and rewarding making a collection of goods for the sale and seeing how the stocks have quickly built up.


Any queries please leave a comment or email me and I'll help with further details but I hope some of you will have a go. 
Don't forget the little fabric handy pots in my previous post, another handy useful little make.

Tuesday, 12 November 2013

WOYWW & Little Fabric Pots

I'm showing my work desk, as so many crafters do on Wednesdays, as part of the brainwave of Julia at Stamping Ground blog. Pop over if you are curios to see more of this world wide phenomena where we share our crafty spaces and all the creativity that's going on. 

I'm so pleased and relieved to hear that Peggy and Patsy, in the Phillippines, have posted, so are safe, but my thoughts go out to all those poor people who are in the midst of this terrible disaster.

I'm quite settled and happy sewing in the window of the guest bedroom where I have a stretch of work desk, right across that side, giving me an area for my sewing machines, overlocker and a large cutting mat. It's lovely and warm and there's good light through the day, so it works very well for me. My happy place!

I've been busy making these cute hady little fabric pots to go into CHICS           (children's cancer care support) Christmas craft sale. 
These are filled with cotton wool balls but could easily be used as trimming pots for crafting or handy storage for scissors and threads etc.
I then made some Christmas themed pots and filled them with sweets.
A bit of patchwork just on the flap of this one....
They are simply made from two 16 inch triangles of fabric, and a layer of interlining, batting, or fine wadding, sewn together, then turned inside out and pressed. The points are held together and they are then stitched half way up the three sides. Simple, quick and economical to make from very little fabric.
The flaps are fastened down and decorated with a bow trim or button. Cute eh?

A friend suggested making them from a softer fabric without any batting inside....so here goes...
they make excellent gift bags with a ring pulled over the points
and the points flap down like petals. I like it!
Next I had the idea to make tiny ones as tree decorations... you can see the size by the penny in the photo.
Here's my evening "work desk"!!! On my lap whilst I'm sitting on the living room sofa making crochet flowers to go on hair accessories.   More fundraising items for the school fair of one of my grandees in Brighton. 
Take a look at my previous post for lots of the finished results.
 I dropped this lot and had quite a tangle to sort out.
I work from a lovely little basket of cotton yarn at my side.
It was lovely to be back in the midst of you all last week, even though I was so late posting. Hope to see more of you this time round!

Monday, 11 November 2013

Crochet Fun!

I haven't been blogging much of late but I have been so busy making all sorts of goodies, in both crochet and sewing, so I've decided to show them here and make an attempt to catch up a little with my crafty life.
 I have veered away from paper crafting completely and have returned to my crafting roots in textiles and I think this was inspired earlier in the year when I started quilt making for the children going through treatment for cancer. 
It has been such a success with so many children receiving a comfort quilt thanks to the generosity of the lovely generous hearted people who have joined in and made them for LillyBo Quilts blog.
Recently, I have been making these friendship bracelets that my DD1 spotted on the lovely colourful, inspirational, Hakenenmeer blog. They have a super tutorial, on their left side bar, if anyone is interested in having a go and they have recently published a super new book. 
My little grandees and their friends have been thrilled with them so I decided to make some for the cancer care group for the children and also for my grandee's school fete.
Not quite finished but these are my own idea with crochet  flowers on plain bands. 
I've also added the flowers to elastic headbands
and snap hair slides
More bracelets packaged up ready to go.
The headbands below have bows made from Liberty Tana Lawn fabric, and they are so popular with both adults and children.
These flowers can be used as handbag bling or keyfobs.
This larger flower has a pocket to hold keys
if the leaf is pulled the key goes neatly into the pocket.
The best thing is that I can take my crochet with me everywhere and most items have been made, in otherwise waste time, whilst travelling (airlines have never refused my taking a couple of hooks on the plane!), whilst sitting in the car, in waiting rooms etc. I find it's very relaxing to do, time passes happily and I have something worthwhile to show for it. 
Next I'll be showing some of my recent fabric makes so keep popping in! 

Tuesday, 5 November 2013

WOYWW? Curly Girly Art

I'm back at last but I am missing these Curly Girlies, the Brighton Belles, who were staying here for best part of a week but have now returned home. 
My work desk was the small breakfast table in the living room, much warmer than out in my workroom, and we all had so much crafty fun together. 
They loved stamping and were making special birthday cards for their Mummy.
We also had tiny tea parties...
They created all this art, ghosts, spiders, skulls etc., to decorate the front of the house before they went out around the neighbours "Trick or Treating" with their baskets and pumpkin lanterns. The little witch was none too happy until she found out that she received SWEETIES!!!
I know how observant you are and, Yes! I did send her back inside to put on her shoes!
Earlier in the week we went to a local Urban Farm and met the adorable, friendly, Alfie the giant rabbit.....
and were lucky to be able to watch this 2 day old litter of 11 saddle back piglets. 
Spot the one with a tiny white band and one with no saddle at all!
I'll be out most of the day but I'll do my best to call in on as many of you as possible later. Must catch up as I've been away from my desk for a few weeks.


Friday, 11 October 2013

An Autumn Friday Smile

My little grandees, the Curly Girlys, have returned to Brighton and as always the house is quiet and I miss them so much but they have left me some of their super artwork.
They delighted in running around in our garden trying to catch the Autumn leaves and bringing me those which they found extra fascinating. A spotty one, a red one, a yellow one, one with holes etc., and it was a joy to watch their happiness from such simple things of Nature.
 I gave them an old wooden platter to hold their favourites and they soon amassed a wondrous collection of leaves, pebbles and stones which they carefully placed under a plant stand and topped with a few flowers.
An unwitting shrine to the season!
 Tiny cat's eye ink pads helped produce some art for my wall.

I'm off in minutes to  Germany to visit the other half of my lovely family and to see again my 4 year old grand daughter and my new first grandson for the first time. 
I'm not smiling, I'm grinning.
I hope you have lots to smile about, but pop over to Annie's blog to see lots more reasons to get you started.


Tuesday, 1 October 2013

Crafty Time with Dolores

I'm not signing in with WOYWW this week as I won't be home enough to reply to comments and join in fully but here's the work desk where Dolores and I have been so busy.
But first, many thanks to everyone who kindly sent such lovely messages of congratulations on the birth of my fourth grandchild, the first boy in the family and a beautiful one at that.
 I am pleased to say that the new family are all really happy and doing fine.

I had a super visit with my lovely friend Dolores whilst she was staying with her DBF down in the South of England. We had lots of crafty fun and also managed a couple of lovely meals out and a few jaunts around the lovely Kent countryside.
Here, Dolores is showing some of the results of our first inky session after making a meander book.
We started by sponging and stencilling Distress Inks at random to make backgrounds which built up layer upon layer.
It still doesn't look too wonderful......
but finally Dolores produced this super background and made her meander book from the large square cut from an A2 sheet of heavy cartridge paper. 
She is going to finish it with stamping, pockets, tags, apertures, and other details and I can't wait to see the results.
One day when we were out and about we just couldn't find a country pub where we could have a meal but by chance came upon the Hawkenbury. 
It is in Staplehurst in the heart of the Weald of Kent. What a sight, so bright and quite kitch with all these murals.
There's Dolores below waving to me that it's OK to enter for our late lunch. All the meals are made using locally sourced produce, freshly cooked. If you look HERE on their website you can see the inn before it was so lavishly painted!
All this is soon to be painted over with new seasonal murals for Christmas!
We were so surprised to find oak beams and a thouroughly traditional pub inside and we were all pleased to enjoy such an excellent meal.
Back later to play a few 60's tunes on the Wurlitzer Juke Box. Great fun which brought back such memories and I do wish I had one.
Fantastic to see this and all the memorabilia in the hall of Dolores's DBF.
Thanks folks for such a fabulous few days of excellent hospitality. We enjoyed every minute.
More evidence of our play time and other jaunts soon.