Saturday 31 January 2015

Patchwork Challenge, Swap, and Hexies

SATURDAY, 31 JANUARY 2015


Patchwork Challenge and Hexies

I received an super packet in the post this morning for the start of a new challenge. I have to make an item from the charm squares I've been given and I couldn't wait to get started. This shows the early stage of my afternoon of stitching and if you are wondering what it will become, you'll just have to wait!
I'm swapping with Diane, the Cheshire Quilter and she has already made and sent me this gorgeous star block so I'd better get my skates on.
I've been keeping myself happy whilst TV watching and on my travels making 1 inch hexies from some of my Liberty Tana lawn stash. I'd already sewn this batch of random colours together quite aimlessly. I am not sure what it will turn out to be but I have a good cause in mind to receive the finished product if it turns out to be something worth having.
Last night, my lovely friend Dolores asked me to make another needle case for her to use in England, as she has left the other one I made in Slovenia. Now at least I know where I am going with this patch of hexies. I love to hand stitch them, and find it really relaxing, especially as I am using such beautiful fine fabric.

Tuesday 27 January 2015

Patchwork Octagon Cushion Panel

I usually hang on to new fabric stash for quite a while before daring to use scissors on it, but I couldn't wait to use some of the Kaffe Fassett, Rowan fabric, I bought last week in John Lewis, Liverpool. 
It was HALF PRICE so I loved it even more. As you may notice, I love a bargain.
I had bought some a while ago, in Black Sheep Wools in Culcheth, at a 10% discount but I was thrilled to find it even cheaper in John Lewis. 
The pattern for this cushion panel was a freebie, given with purchases in Black Sheep, but I modified it quite a bit as I found the pattern somewhat difficult to follow. 
I adore the vibrant colours and pattern of all the Rowan designers and they all blend together so well, no matter how garish they look on the roll. The fabric is a super quality and so beautiful to work with, especially for hand stitching.
Now I am undecided. Decisions, decisions.
Should make one 2 sided cushion, or two (backed with a toning fabric)? 
Stay safe, warm  and cosy if the bad weather is hitting your area. We're fine here in North England but I don't envy those on NE coast of America. 
It's a good excuse to stay indoors and get crafting!

Sunday 25 January 2015

Patchwork Bag of Appliquéd Chickens & my bargains.

This week I made myself a huge tote especially for carrying all my stash to and from my quilting classes. It has a zip pocket inside for all my small equipment and this special appliquéd chicken pocket on the outside. The bag has ties on the sides.
With credit to Chris's comment, and as it's over 20 inches square, I am going to call it my "Chuck" Everything In Bag!!!
Detail of the pocket I designed for a bit of fun, which has the  three chucks sitting on a wall, legs dangling. 
Here the ties, (made of ribbon printed with tape measures) are open to make it wider and they can just be slipped inside the bag. 
I took a trip to Sandbach in Cheshire today to a one day fabric sale and quilt exhibition. We had planned to go in a group but never got around to organising it and I really only expected it to be a small event. 
When the sun was shining this morning I asked if DH would take me there if I treated him to a pub lunch after the show and so we took a lovely drive off motorways, through the country lanes of Cheshire and the show was fantastic. Lots of retailers from all over the country and lots of bargains to be had. Demonstrations to from various quilt groups but not too many quilts on exhibition. There were refreshments, a sale of smaller hand made items in aid of a charity and a raffle.
I bought six fat quarters with little green apples design all for £6, yellow and green backing fabrics for two quilts for £4 metre. The diamond and black fabric for £4 metre.
This "Parade" print was a super bargain 3 metre remnant for only £4 for the whole piece and it will make Summer skirts for all 3 of my girly grandies as the design runs along each edge.
There was a stall that was closing down their business and selling the entire stock just to clear it. Everything was so cheap, but I controlled myself to items that I would be sure to use and could share with my friends. Below you can see rolls of 1 inch black and white elastic, a reel of narrow peach elastic and a reel each of black and white tape. All, amazingly, only £1 a REEL! Wow!
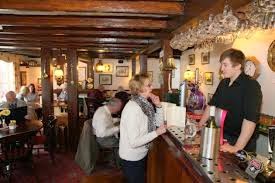
We left the Sandbach High school and drove to a favourite haunt in Tarporley, The Rising Sun Pub, a traditional pub with oaks beams and lots of copper and brass about, where we relished a super Sunday roast with all the trimmings. 

I can highly recommend this pub for food, friendliness and service. It changed hands not so long ago and we feared it might not live up to previous visits. It was excellent!

Friday 16 January 2015

Dresden Plates Patchwork and Friday Smile

I've had such a productive week .....
Two Dresden plates as my contribution to my Quilt Group's "Block of the Month"
I also made 2 large design walls and a few small block layout boards (these dresden plates are displayed on them). I bought a bargain length of white felt from Abakan (fabric pieces cling to it) and scrounged a couple of large display boards from a local store. I am so pleased with them and they are so helpful. I made them to fold so I can pop them, out of sight, into the wardrobe in my sewing room.
I made this bed runner (below) for my SIL to keep her feet warm. She is diabetic and has circulatory problems and wanted something to go just across the bottom her bed.
I made it really quickly and easily from the leftovers of the full size strip quilt I made a few weeks ago and it is 65 cms wide by 2 metres long.
It matches the dish on my coffee table so well.

At the request of the members of my quilt group, I also prepped a pattern for them of the owl bag I recently made. (It's in my 26th Dec post)
Things seem to be going much better and I feel that I have come out of the gloom of January and found my mojo once again. I'm smiling and, 
as a result, I'm joining in again with Annie's Friday Share a Smile....
Pop over for a visit and you'll find lots more to smile about.
My main smile for today was to receive this super calendar from two of my far away grandies, the Brighton Belles.
Lovely to see their smiling faces each day in my kitchen, and I always enjoy turning the pages each month to remember what they got up to in 2014.
Have a good weekend, ......the evenings are staying lighter longer so Winter will soon be gone. Yes, really, it will!

Sunday 4 January 2015

Easy Patchwork Decorations

Another belated Patchwork Christmas Decoration but I promise this will be my last until next November/December. Please forgive me as I know that if I don't record this now that I will have forgotten about it when I want to make more for next Christmas.
This one is even easier than the last.
Cut two circles of contrasting fabric (mine were 16 cms diameter) 
Sew together leaving a gap to turn inside out.
Press, then top stitch near to edge.

Bring two sides together  and catch a stitch in the middle to secure.
Repeat with the other sides.
Turn over the four corners
Neaten up so it looks like this one below.

Add a trim or button to the centre and a hanging loop and that's all there is to it. 
Easy peasy, or what? Happy Next Christmas!


Thursday 1 January 2015

Patchwork Star Decorations

Happy New Year to everyone. 
Here's wishing you all that you wish for yourselves.
No New Year resolutions for me just hopes that I manage to see my far off family members more often and we all stay healthy and happy.

We returned home, a couple of days ago, after visiting the Brighton Belles and whilst it was so lovely to see them it was such a long journey to take at this time of year. It was almost 6 hours coming home but it took us an horrendous 8 hours to get there due to the backlash of major problems on British Rail. The roads were extremely congested as everyone took to the roads to get home after Christmas, instead of travelling by train. 
After snow the previous night, we happily set off on a sunny morning, so pleased that the weather had cleared and really looking forward to seeing the Brighton branch of our family. We were oblivious that it would take us two and a half hours just to travel the first 30 miles of our 230 mile journey.

During the daylight hours I stitched away whilst poor DH valiently drove the car. I had taken fabric and threads and a few ideas to play with but there is a limit to crafting in the car. It has to be simple and straightforward so here's my results and at least I had something to show for sitting in the car for sooooooo long. 
A tad late for Christmas Decorations, I know, but at least I am a step ahead for next year!
 I doubt if anyone will want these instructions now that Christmas 2014 is over but I am posting them as a reminder to myself incase I want to make more for Christmas 2015.

The star decorations are so simple to make and are even easier if a fabric glue pen is used to stick down the pieces before adding a few stitches to attach the beads. 
I left in the base  template card to weight them and make them firmer. 
There are plenty of free templates on the web just trim them to the sizes you prefer. 
Using contrasting colours for large and small templates cut fabric 1 cm bigger than templates. 
Cover smaller card pentagons of desired size (I used 5cm template) by tacking or gluing. 
A smaller card template is needed for each star decoration but only one larger template is needed as this can be reused, over and over.
Cut fabric 1 cm bigger all round than the larger template (I used 6.2 cm template).
Press down 1 cm of fabric over the card. 
Remove fabric (saving the card template to use again) and tack or stick down the folded, pressed, 1 cm edge.

Position the smaller covered pentagon onto the larger pentagon, as in picture.
As you can see, the smaller pentagon does not quite meet the edges to allow the larger pentagon to fold over sufficiently.
Fold over the points of the larger fabric pentagon on to the smaller one.  
Glue down, or pin and stitch, to the smaller pentagon. 
This forms the star centre as shown in pic below. 
Stitch beads to the star points. 
(Beads could easily be attached whilst stitching around points is in progress.)
Add a hanging cord or ribbon.